Tutorial: Making sounds with Piezos
Table of contents
- What is a piezo
- Using a Piezo
- Wiring a piezo
- Controlling a piezo
- Setting up the Sketch
- Compiling and send to your Particle board
- Find out more
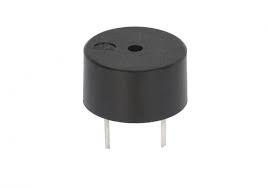
What is a piezo
The piezo is essentially a simple speaker. Passing electricity through the terminals expands and contracts a plate causing vibrations. This is done rapidly and these vibrations are transmitted as sound through the air.
We use PWM pin to control the sound it makes. For example, middle C has a frequency of 261, so if you turn it off and on 261 times a second you will hear that note.
Using a Piezo
In this tutorial, we’re going to wire up a piezo to play a basic sound. You can experiment with the code and tutorials to play melodies, basic sounds or use inputs like a light sensor or FSR to create a DIY theramin
You will need
-
Particle Microcontroller
-
Piezo
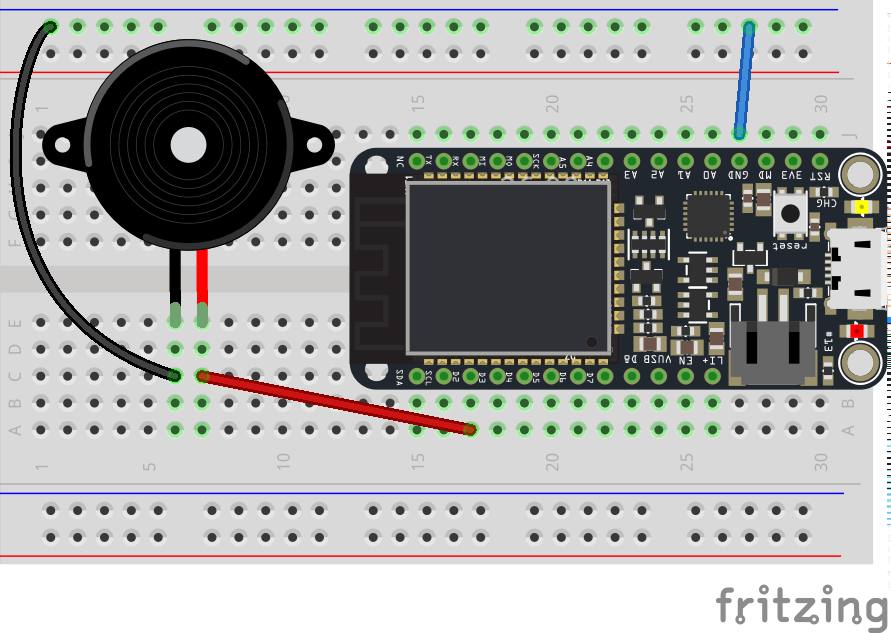
Wiring a piezo
Is super easy. One of the terminals goes to ground and the other goes to a PWM pin, in this case D2
The circuit, wiring and components should look like this
Controlling a piezo
To control the Piezo we use two built in functions - tone() and noTone(). These allow us to generate sound waves using PWM and stop them.
Tone can be called as follows:
tone(pin, frequency)

tone(pin, frequency, duration)
Where you tell it the pin that is connected to the Piezo, the frequency you want to generate and how long you want to sustain that note in milliseconds (1000 milliseconds = 1 second)
tone and noTone()
Look up these functions and how they let you control sound here: https://docs.particle.io/reference/firmware/photon/#tone- and https://docs.particle.io/reference/firmware/photon/#notone-
Now let’s put this into practice with the circuit above…
Setting up the Sketch
Define the variables to use for the servo. Notice that we have created a slightly different kind of varaible. This is an array. It’s kind of like a shelf of variables. You can put a set of connected values into each of the shelfs, referencing them by a number.
int speakerPin = D2;

// create an array for the notes in the melody:
//C4,G3,G3,A3,G3,0,B3,C4
int melody[] = {1908,2551,2551,2273,2551,0,2024,1908};

// create an array for the duration of notes.
// note durations: 4 = quarter note, 8 = eighth note, etc.:
int noteDurations[] = {4,8,8,4,4,4,4,4 };
About Arrays
An array is a collection of variables that are accessed with an index number. Read more at: https://docs.particle.io/reference/firmware/photon/#data-types and http://arduino.cc/en/Reference/array
Next we setup the sketch and play the notes
void setup() {

  pinMode( speakerPin, OUTPUT );
  playNotes();
}
This will play the notes just once. If we wanted to play them repeatedly, we can add the call to playNotes() in the loop function. For now we do nothing in the loop
void loop() {
}
We create a new function to play the notes
void playNotes()
{
    // iterate over the notes of the melody:
    for (int thisNote = 0; thisNote < 8; thisNote++) {

      // to calculate the note duration, take one second
      // divided by the note type.
      //e.g. quarter note = 1000 / 4, eighth note = 1000/8, etc.
      int noteDuration = 1000/noteDurations[thisNote];
      tone(speakerPin, melody[thisNote],noteDuration);

      // to distinguish the notes, set a minimum time between them.
      // the note's duration + 30% seems to work well:
      int pauseBetweenNotes = noteDuration * 1.30;
      delay(pauseBetweenNotes);
      // stop the tone playing:
      noTone(speakerPin);
    }
}
This:
-
Loops over each note to be played.
-
Then it calculates the duration in milliseconds for each note
-
It uses the tone function to play that note
-
It pauses for a moment between notes
-
Finally it stops playing the note and moves to the next note in the sequence
Compiling and send to your Particle board
Compile and listen to that music!
There’s lots of uses for a Piezo
An array is a collection of variables that are accessed with an index number. Read more at: You can use a piezo as a sensor to detect knocks. Read more: http://www.arduino.cc/en/Tutorial/KnockSensor