Setting up the Command Line Interface (CLI)
Table of contents
- Install the Particle CLI
- Launch Particle CLI
- Login through Particle CLI
- Get the Device Info
- Get the Mac Address
- Get the Particle API Token.
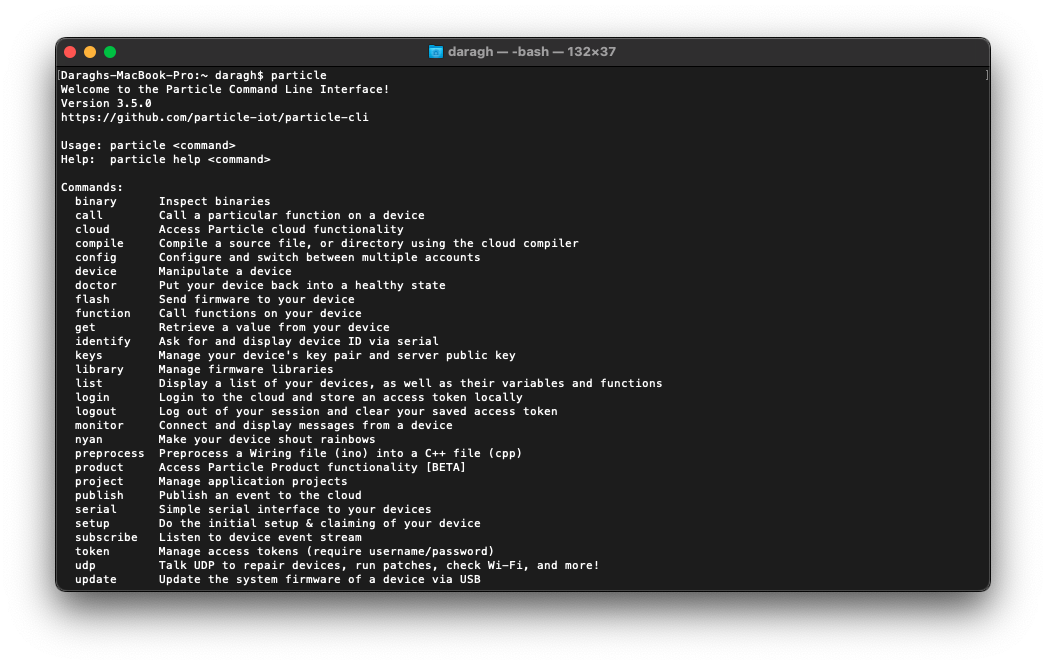
The Particle CLI in a Mac OSX Terminal window. Note this might look different if you are on Windows or Linux
The Command Line Interface (or CLI) is a way of interacting with the Particle framework quickly and easily on your computer. It allows you to quickly type text-based commands that will let you do things like see if your device is online, compile code, and interact with your microcontroller.
The CLI is also necessary for anyone on the CMU network. It’ll allow you to get the MAC Address (a unique identifier) of your device and enable it to work on the CMU wifi.
It’s a simple process to get up and running with. This guide will walk you through it.
Install the Particle CLI
The CLI is a command line tool for Windows, OSX and Linux to manage and configure your devices.
First, you will need the Particle command line interface (CLI) installed.
To install it, follow this guide provided by Particle.
Launch Particle CLI
Now that the Argon is powered up and the CLI is installed, we can being the process of claiming the device.
On your computer, open a Terminal (OSX) or Command Prompt (Windows) window
Type particle. You should see something like the below. If it doesn’t load, check the installation guide for the Particle CLI
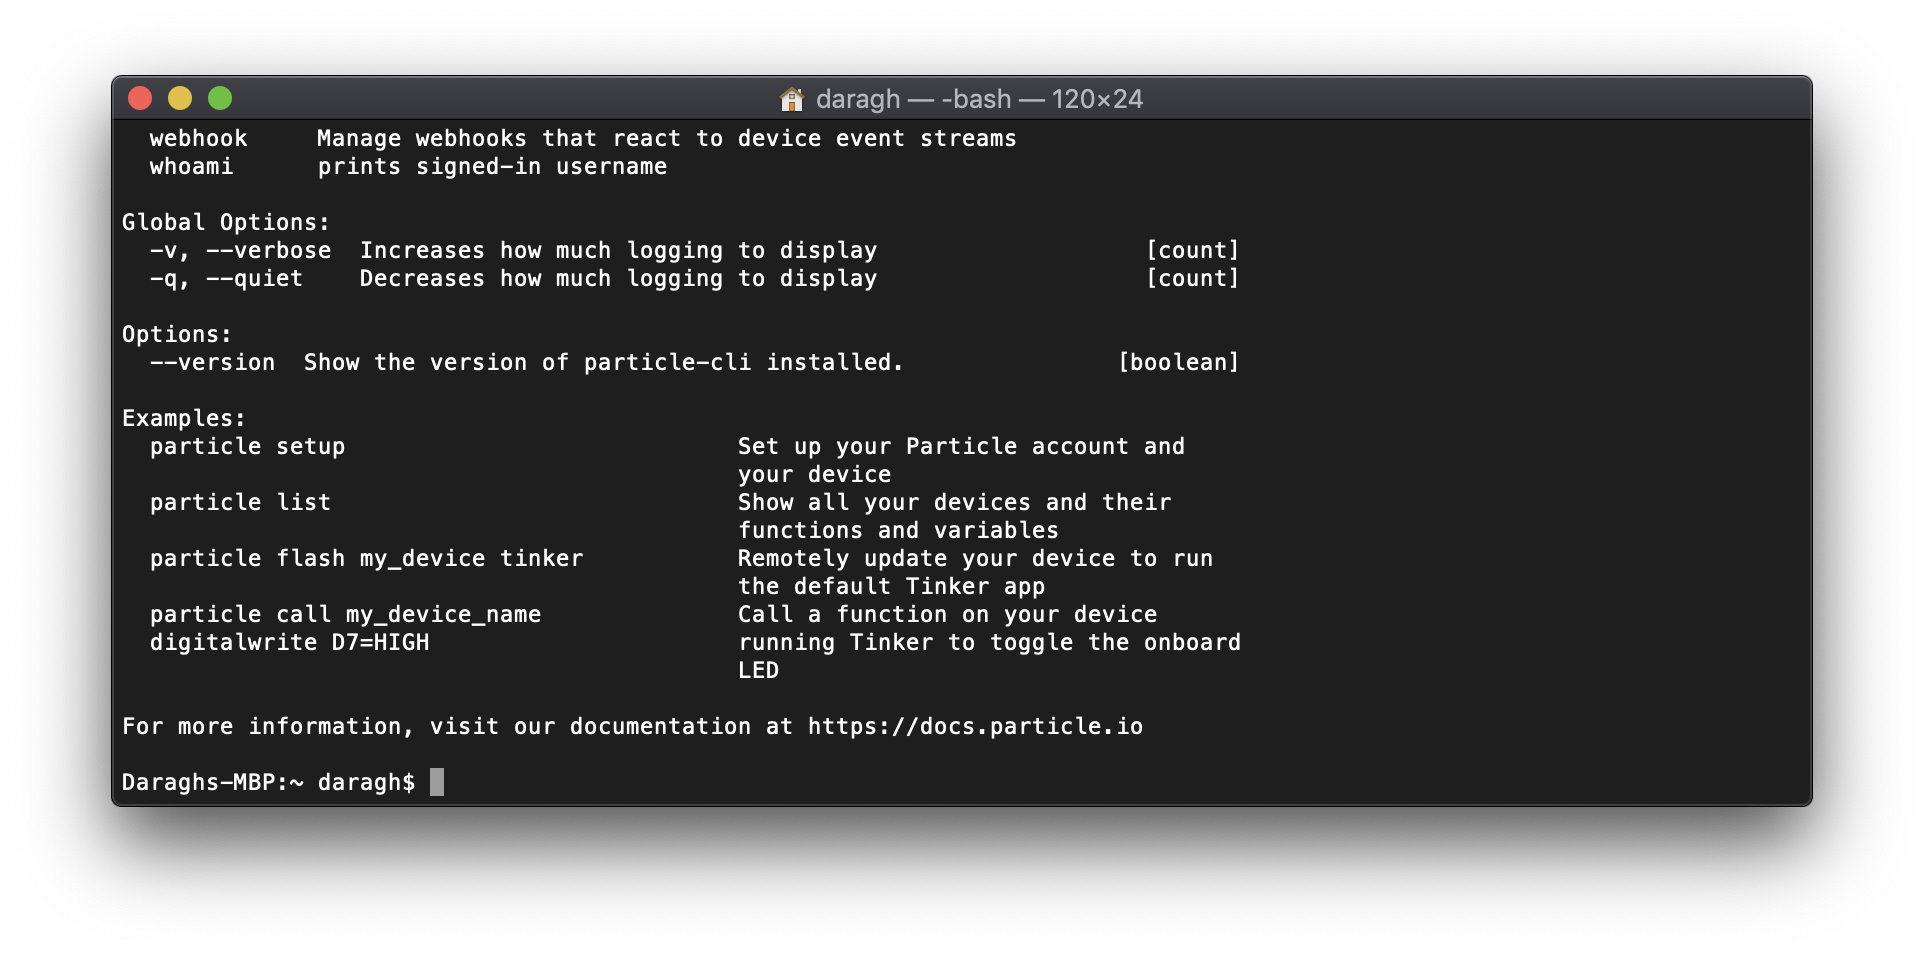
The Particle CLI in a Mac OSX Terminal window. Note this might look different if you are on Windows or Linux
Login through Particle CLI
If this is your first time using the CLI, you’ll need to sign in (you should only need to do this once)
Type
particle login
And provide your username and password that you created when signing up at Particle.io
Get the Device Info
Each Particle device has a unique ID (a long alphanumeric string). This is what the Particle Cloud knows the device as. It’s a big long string of letters and numbers that uniqiely identifies it. We’ll need this ID in order to make a link between your Argon and your account. To find this information, type:
particle identify
You should see something like this:
Your device id is xxxxxxxxxxxxxxxxx
Your system firmware version is 0.8.0-rc.27
Keep a note of the device ID. You’ll need it in a moment!
Not working or not displaying information?
If your device isn’t returning any information, there’s a couple of things to try
First, is it in listening mode? To check, just make sure the LED on your device is blinking deep blue. If its not, just hold down the MODE button for 3-5 seconds and try the steps again.
Second, you might need to update your firmware Firmware is the stuff that makes the board work - it monitors, controls and interfaces with the hardware, and it interprets the code you send it to make it work. Sometimes it needs to be updated to add new functionality or to patch problems. The easiest way to do this is to install the Particle CLI. Once installed, put the device in the DFU mode.
To do this, hold down the MODE and RESET buttons together, then release the RESET button. Wait a couple of seconds and the LED on the board will begin to flash yellow. When it does release the MODE. It should stay pulsing yellow. If it doesn’t or it’s another color, press reset and try again!
Then go to the command line and type particle update
If all goes well your device will have the current firmware in 30 seconds, then you can try the above again!
Get the Mac Address
This is where the fun begins because the CMU network doesn’t play nice with devices. In order to get a device on the network we need to know its MAC address and to know its MAC address we need to have it on the network. Yowsers!
Mac Address - This is what a wireless network knows the device as. It’s a unique identifier for the hardware we’re putting on the network. We need to know this to put the device on the CMU network.
To get this info, type
particle serial mac
You should see something like this:
Your device MAC address is 12:34:56:78:90:ab
Keep a note of this ID. You’ll need it in just a moment.
Get the Particle API Token.
You won’t need this immediately but it is helpful for some of the work we’ll do later in the semester.
The tokens are long alphanumeric sequences that are used when you want to let other devices, web services or tools interact with your device through the Particle Cloud. Essentially, this token is linked to your account and so anyone who has it is assumed to be someone you’ve trusted to have access to your devices. These web services can then using a token as a way to authenticate to a Particle account and interact with the devices linked to it.
To find your current tokens, type
particle token list
You should see something like this:
cloud-compile
 Token:      ba6fXXXXXXXXXXXXXXXXXXXXXXXXXXXXXXXXXXXX
 Expires at: null

user
 Token:      3627XXXXXXXXXXXXXXXXXXXXXXXXXXXXXXXXXXXX
 Expires at: null
If you want to create a new token to share with a service, or to use with others in this class, type
particle token create
It will create a new access token that will expire by default and that you can use for prototyping interactions.
Don't share or post your tokens publicly
As these tokens can be used to access your devices, you shouldn’t share them publicly, in an open document, etc. Basically, be careful with them.