Paired Devices with Webhooks: Interact with Particle Devices on another account
Table of contents
- Step 1: Create identical circuits
- Step 2: Adding Events
- Step 3: Find your Access Token
- Step 4: Setting up your webhook
- Step 5: Paired Devices
- Additional Exercises
The example below allows you to use the same code to control two or more identical devices that are on different Particle user accounts.
For this example to work, you’ll need to work in pairs to:
-
Set up two identical circuits
-
Write some code that publishes an event (this will trigger a webhook) and subscriptions to an incoming event name (this will be what gets triggered by the other device).
-
Set up a webhook that uses _the other persons developer ACCESS TOKEN _ to make a call to the Cloud API that will publish an event. This event will correspond to the name of the
Particle.subsubscribeevent i.e. the other device will be listening to it.
Here’s a visual summary of what we’re about to set up:
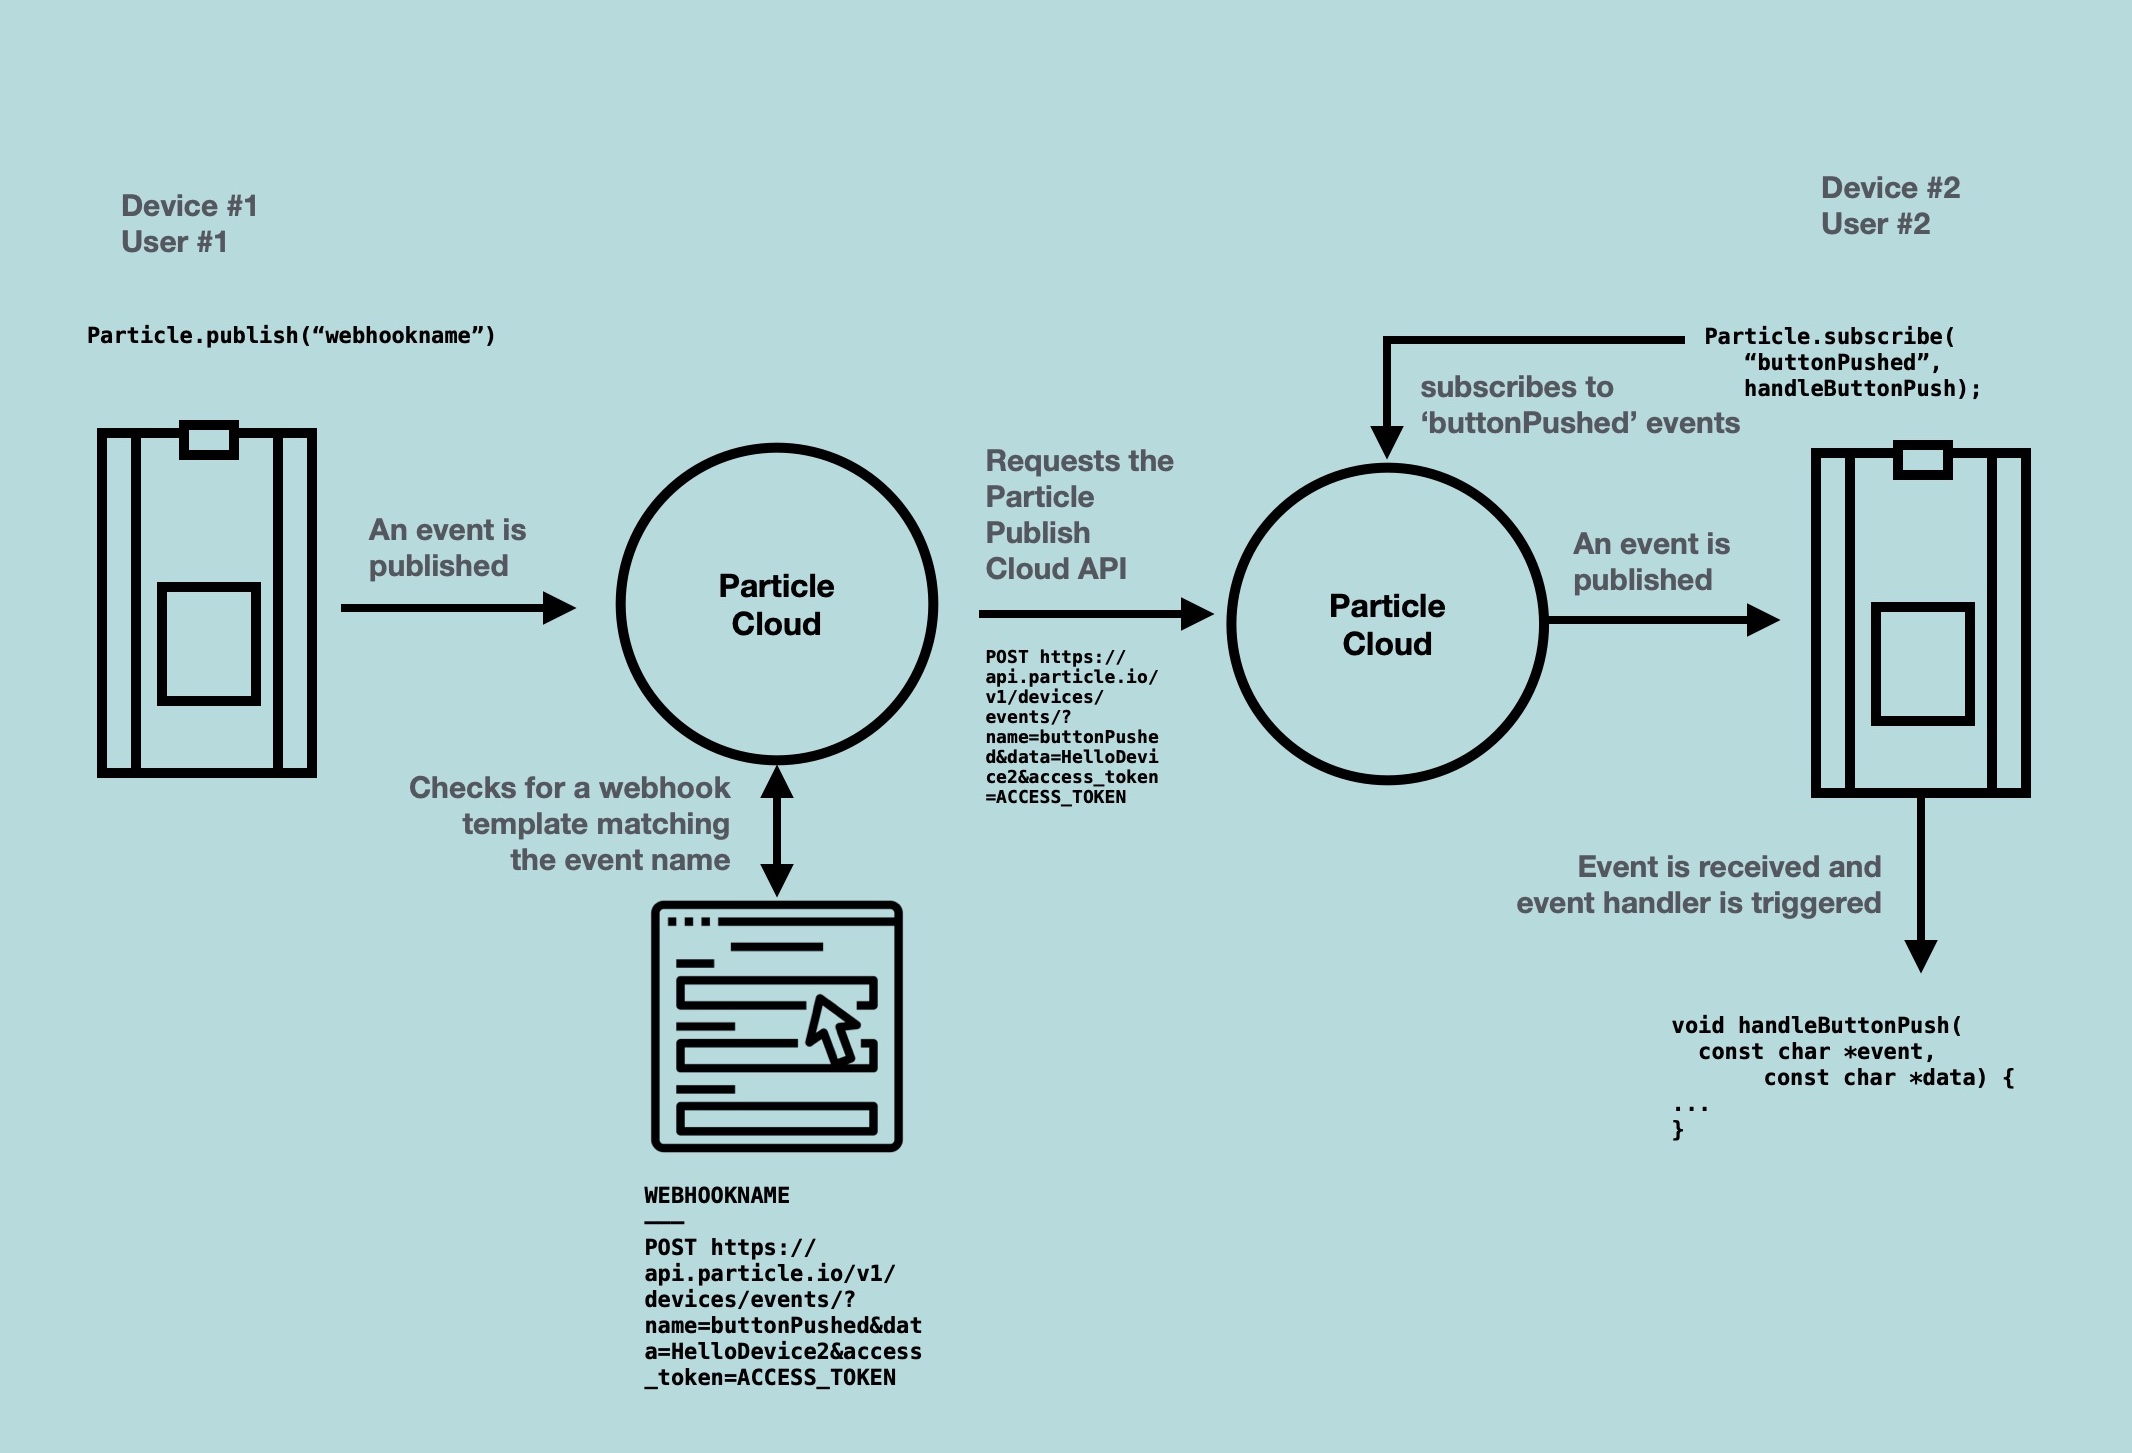
Step 1: Create identical circuits
We’re going to keep this simple. Create a circuit with a push button and an LED.
-
When the push button is pressed, we’ll fire off a new event with
Particle.publish. This in turn will trigger a webhook. -
The webhook will communicate with the Partice Cloud, and publish an event on the other persons account.
-
A
Particle.subscribewill listen for that incoming event. -
Once received, it’ll blink the LED.
We’ll create the simplest possible circuit as outlined in https://diotlabs.daraghbyrne.me/docs/getting-inputs/buttons/
The circuit, wiring and components are as follows:

The initial code will be:
// We will be using D2 to control our LED
int ledPin = D2;

// Our button wired to D0
int buttonPin = D3;

void setup()
{

  // For input, we define the
  // pushbutton as an input-pullup
  // this uses an internal pullup resistor
  // to manage consistent reads from the device

  pinMode( buttonPin , INPUT_PULLUP); // sets pin as input

  // We also want to use the LED

  pinMode( ledPin , OUTPUT ); // sets pin as output

	// blink the LED when the setup is complete
	blinkLED( 3, ledPin );

}

void loop()
{
   // find out if the button is pushed
   // or not by reading from it.
   int buttonState = digitalRead( buttonPin );

  // remember that we have wired the pushbutton to
  // ground and are using a pulldown resistor
  // that means, when the button is pushed,
  // we will get a LOW signal
  // when the button is not pushed we'll get a HIGH

  // let's use that to set our LED on or off

  if( buttonState == LOW )
  {
    // turn the LED On
    digitalWrite( ledPin, HIGH);
  }else{
    // otherwise
    // turn the LED Off
    digitalWrite( ledPin, LOW);

  }
	delay( 1000 );

}

void blinkLED( int times, int pin ){

    for( int i = 0; i < times ; i++ ){
        digitalWrite( pin, HIGH );
        delay( 500 );
        digitalWrite( pin, LOW );
        delay( 500 );
    }

}
Step 2: Adding Events
If you’re not familiar with the publish and subscribe event’s model within Particle, now’s a good time to step back and review that material: https://diotlabs.daraghbyrne.me/docs/working-with-data/communicating-events/events
We’ll begin by adding a Particle.publish to trigger the webhook. We’ll name this doPairedPublish. This will also be used as the name of our webhook too. Modify the code to add this:
  if( buttonState == LOW )
  {
    // turn the LED On
    digitalWrite( ledPin, HIGH);
    Particle.publish( "doPairedPublish" );

  }else{
    // otherwise
    // turn the LED Off
    digitalWrite( ledPin, LOW);

  }
		delay( 1000 );
Flash your code, open the console (http://console.particle.io), push the button and make sure you see the event appear before proceeding.
__Next, we’ll add the subscribe. __
In the setup() add:
Particle.subscribe( "blinkLED", handleBlinkLED );
Add a corresponding codeblock that for the event handler
void handleActivateLED( const char *event, const char *data)
{
   doBlink = true;
}

Next, add a global variable at the top of the code to store the blink state:

````js
bool doBlink = false;
Finally, modify the loop() to include this code. This will blink the LED when doBlink has been set to true i.e. after a blinkLED event is received.
    if( doLED == true ){
        blinkLED( 6, ledPin );
        doLED = false;
    }
Flash your code, open the console (http://console.particle.io), go to the events panel, and test this by sending an event named blinkLED to your device.
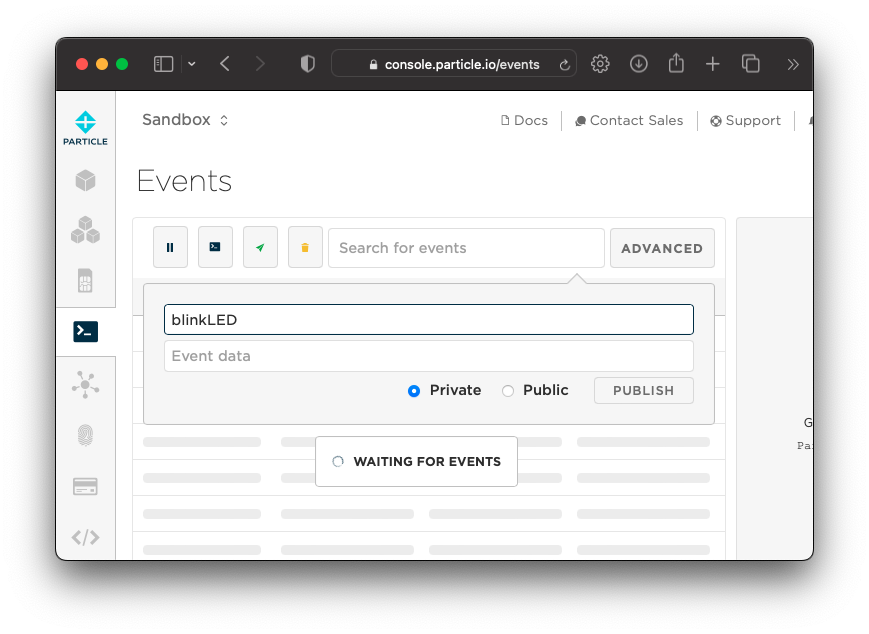
If your LED blinks 6 times, you’re good to go.
Step 3: Find your Access Token
Before we set up the Webhook to interact with your partner’s account and devices, we’ll need to find your Particle Developer Access Token.
In order for us to connected to the Particle Cloud API, we need to provide it with the access token: this is the credential or a key that identifies that that service has your permission to interface with your devices. A
In order to generate that token, you’ll use the Particle CLI
- On Windows, open the Command Line Prompt
- On Mac OSX, open the Terminal
To generate a new access token, type:
particle token create --never-expires
When you hit Enter, provide your password and it’ll generate that key or that token that you can provide to a bunch of services to connect. Keep that safe. You should never kind of put it anywhere public. It should look like a long alphanumeric key:
New access token never expires
    3b742eXXXXXXXXXXXXXXXXXXc407
Note: The --never-expires is an extra option to make sure the token won’t expire. If you don’t do this, you’ll need to update the access token every 90 days.
Once you have this token, share it with the person you’re working with. This will allow them to publish a Particle event to your device.
Don't share or post your tokens publicly
As these tokens can be used to access your devices, you shouldn’t share them publicly, in an open document, on a webpage, etc. Basically, be careful with them.
Step 4: Setting up your webhook
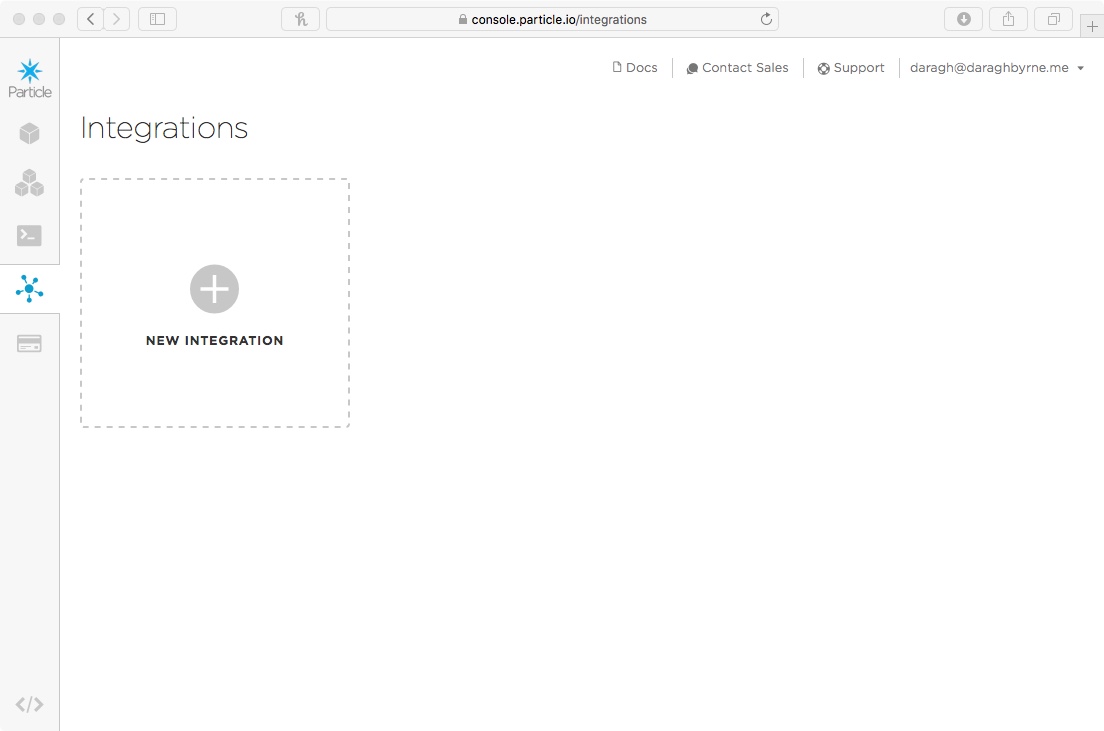
Go to the Particle Console and sign in. On the left hand side there’s a small icon bar, you’ll find an option for ‘Integrations’.
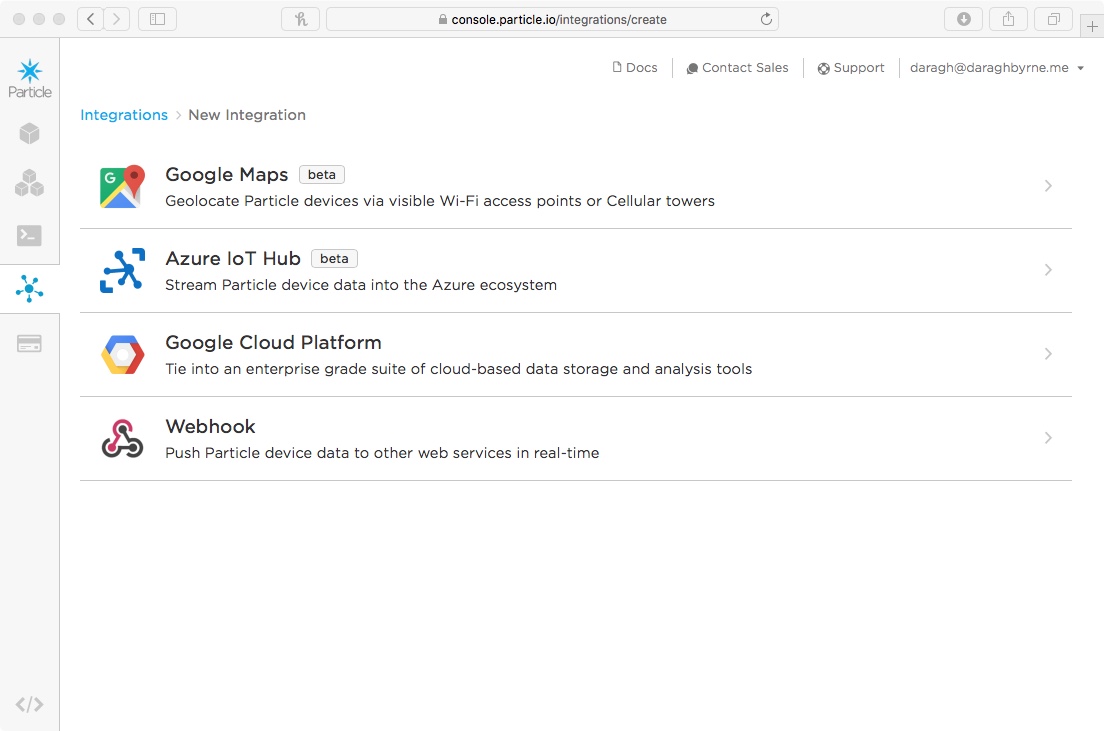
Click it and choose the option to add a new integration. You’ll get four options like this. Choose the webhook.
You’ll then be asked to add the info for your webhook.
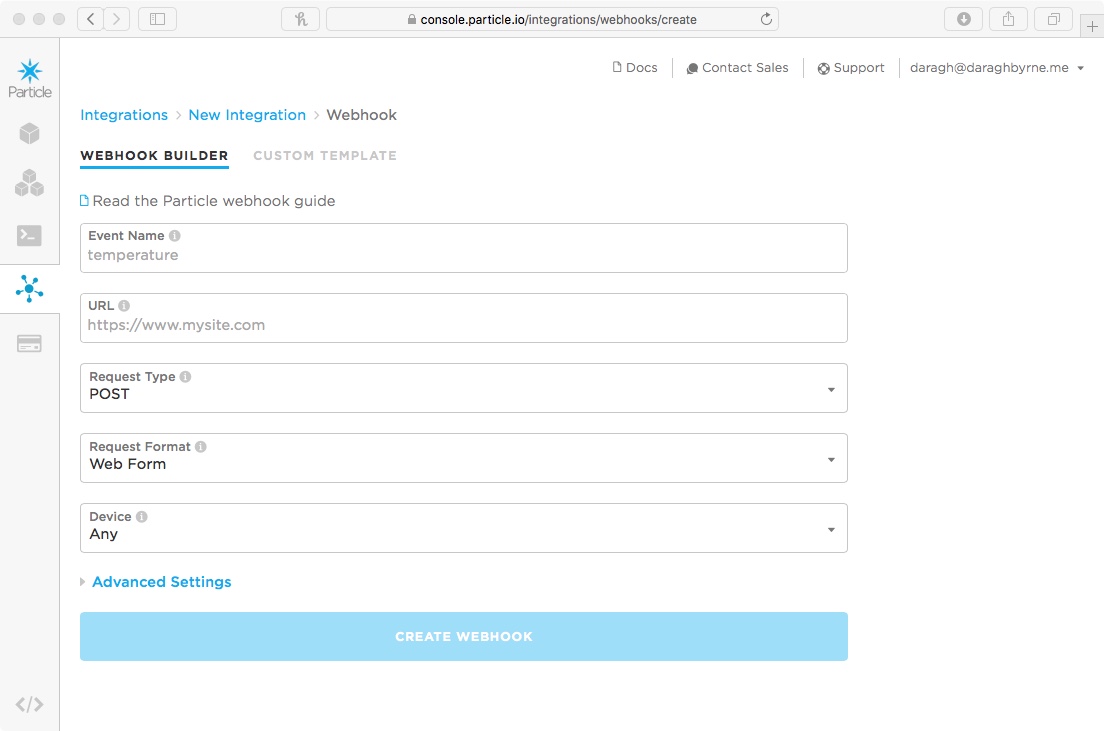
Add the following:
- Event Name:
doPairedPublish - URL:
https://api.particle.io/v1/devices/events - Request Type:
POST - Request Format:
Web Form - Device:
Any
Select the Advanced Options:
Under Form Fields, choose custom add the following:
name>blinkLEDdata>Hello Worldprivate>trueaccess_token>THE ACCESS TOKEN
Substitute in THE ACCESS TOKEN for the token you’ve received from the person you’re working with. It should look like this:

Then create the WebHook, and test it by
- Have the other person, open the console (http://console.particle.io) and navigating to the events tab
- Clicking the
Testbutton at the top of the webhook page.
If all is set up correctly, you should see the event appear in their console!
Step 5: Paired Devices
Now you should both:
- have the same circuit
- have a Webhook that can share an event with each others device
Press the button on one of the circuits, and fingers crossed it should trigger the LED to blink on the other circuit!
Additional Exercises
Get some practice in!
Exercise 1
Currently the program will blink a fixed number of times. Modify each program to keep track of how many button pushes have been made and use this to blink the LED a corresponding number of times.
Exercise 2
Change out the components used in the paired device example for something more advanced: for example map a potentiometer (dial) to a servo, a sensor to a neopixel, etc.