Controlling PWM: Using analogWrite
Table of contents
- Step 1: Create your Circuit
- Step 2: Setting up the Sketch
- Step 3: Compiling and sending to your Particle Device
- Step 4: Controlling your Light.
- Additional Exercises
Turning an LED on and off just isn’t enough. Let’s look at how we can fade an LED and make a virtual dimmer switch using the Particle Cloud
Step 1: Create your Circuit
The circuit, wiring and components are identical to the last time.

Circuit diagram for this tutorial
Step 2: Setting up the Sketch
Let’s get the basics of our sketch underway. We’re going to have an LED controlled on pin D1, create a cloud function to set its brightness, and create a Cloud variable that will allow us to request the current brightness of the LED.
Add your variables
We’re going to use D1 again, so set up a variable that maps to that pin at the top of your sketch.
Also add a variable that we’ll use to track the brightness of the LED called ledValue:
// name the pins
int ledPin = D1;

// create a variable to store the
// current brightness of the LED
int ledValue = 0;
Setup setup()
Now, let’s specific the basics of our sketch. We need to configure pin D1 as output. We’ll also want to create a Particle function to set the brightness remotely over the internet and a variable so we can find out what the brightness might be set to.
void setup()
{
   //Register our Particle function to allow
   // Control of the LED
   Particle.function("led", ledControl);

   // Make the variable 'ledValue' available through
   // the Particle cloud as 'brightness'
   Particle.variable("brightness", ledValue);

   // Set up pin for output
   pinMode(ledPin, OUTPUT);
}
What happened to a loop()
In this case, all of the heavy lifting is going to be handled by an internet connected function. We don’t need the Particle device to do anything during the loop so we leave this totally blank.
void loop()
{
   // Nothing to do here
}
The Main Method
While there’s nothing in loop we do need to have some functionality to control a light.
Our function is called ledControl. It returns an integer and it takes one parameter called command
int ledControl(String command)
{
    // Convert the passed variable to an integer
   ledValue = command.toInt();

   // Check it is a valid number
   if( ledValue > 255 ) return -1;
   if( ledValue < 0 ) return -1;

   // Use PWM to set the brightness
   // of the LED
   analogWrite(ledPin, ledValue);

   // Return 1 to say completed successfully
   return 1;
}
Let’s walk through what is happening here. The function starts with a string (some text) being passed to it from the internet or elsewhere in the code.
We expect that the function will be sent a number to set the brightness. We start by converting the string into an integer using the toInt() method.
.toInt()
We have seen that variables have a type. We’ve already encountered strings (or text) and integers (int). Variables are strict about what type of information can be stored in them. ints will only store whole numbers. Strings will only store text.
Sometimes we need a way to move information across types. Thankfully there are some helpful methods for doing just this. toInt is a method or function available on variables of type ‘String’. If the string is a number it will return that number otherwise it will return 0.
For example:
String text = “1234”
int newNumber = text.toInt(); // sets 1234 to newNumber
text = “s23”;
newNumber = text.toInt(); // isn’t a number, sets 0 to newNumber
text = “5”;
newNumber = text.toInt(); // sets 5 to newNumber
You can read more at: http://arduino.cc/en/Reference/StringToInt
Next, we know that our microcontroller can set a brightness from zero to 255, so it must be in this range. We have some logic (if statements) to see if it the number is less than zero or if it is more than 255. If it is, we stop doing anything more by returning out of the function.
Finally, we use the analogWrite function to set the brightness of the LED using pulse width modulation and return an integer with the value of 1 to indicate everything was completed and a new brightness value was set.
analogWrite
Remember that analogWrite allows us to control the PWM to a specific PIN. It only works on certain pins too. It takes a value from 0-255 (256 increments).
Read more at: https://docs.particle.io/reference/firmware/photon/#analogwrite-pwm-
Step 3: Compiling and sending to your Particle Device
Make sure the Status Bar has a device connected and the device’s indicator is breathing blue. If not make sure your device is connected by USB and is getting a WiFi signal.
Press the Lightning bolt on the top left of the window.
You’ll see a message ‘Compiling in the Cloud’ and a few sections later your device should start flashing magenta.
Wait a few moments, it should return to breathing blue, and the LED should be off.
Step 4: Controlling your Light.
There’s three ways to control your light. The easy way is through Particle Dev, and then you can make a RESTful API call. We’ll do both.
4.1 Using Particle Console.
Navigate to the Particle console online at http://console.particle.io, choose your device and you’ll see a list available functions on the right hand side. Note: You might need to refresh the page for it to appear.
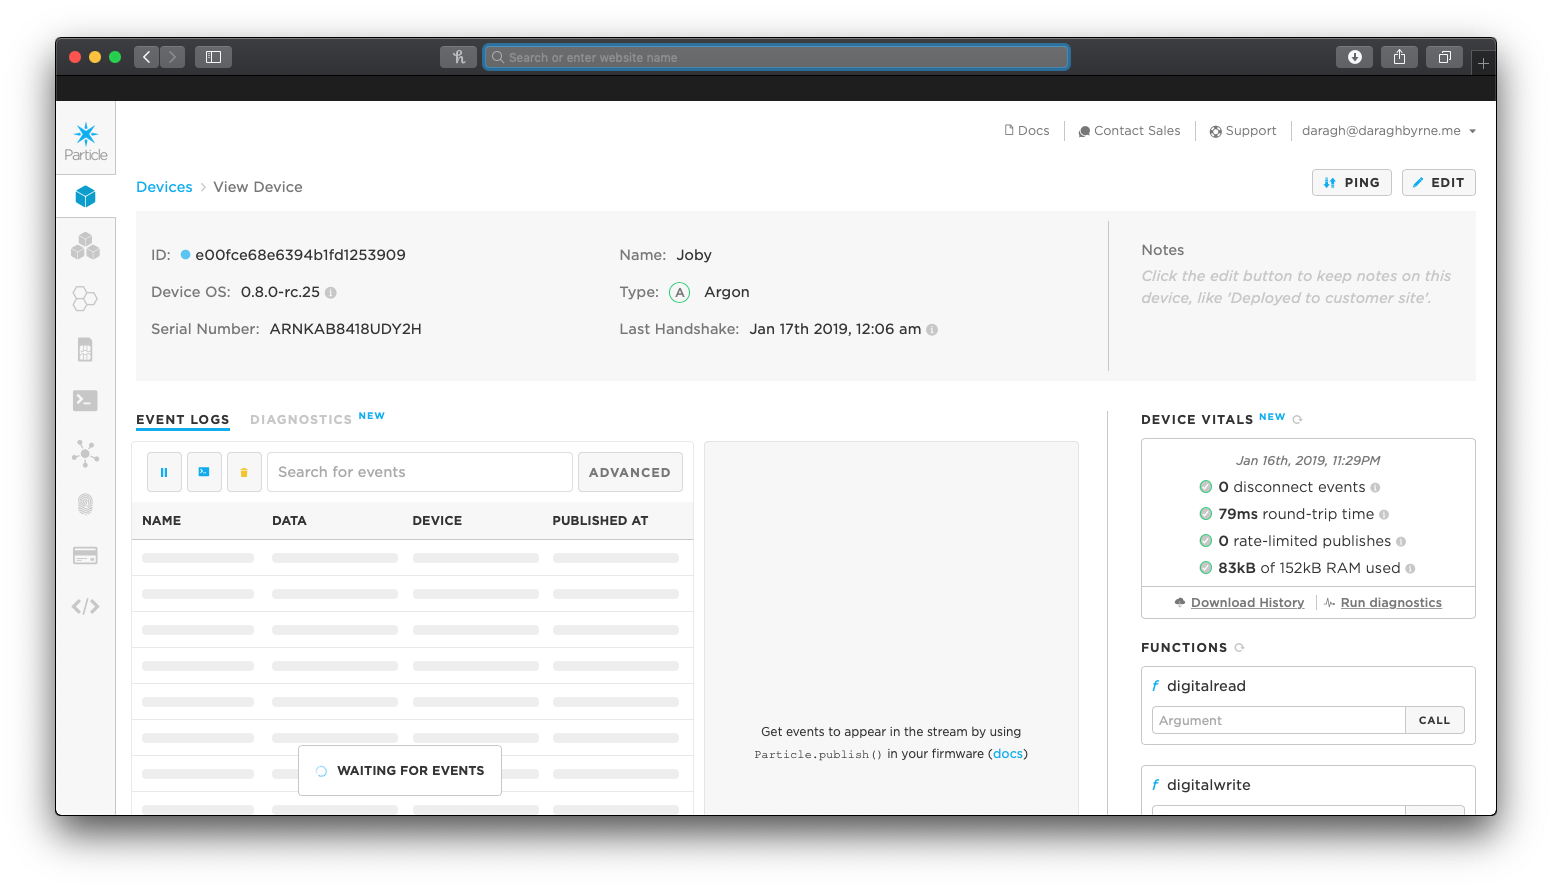
You should see a text box beside your function named led. Just type a number into the box. The box marked ‘Result’ beside the == sign will show a spinning indicator for a second and then your light should respond as expected.
4.2 Using the CLI
If you have the command line interface installed you can call:
This will let you see all of your devices and the currently available functions:
particle function list
If you want to call one of them you do the following
particle function call [device_id] [function_name] [param1] [param2]
e.g.
particle function call 360031000447343232363230 led HIGH
Congratulations! You just put your LED on the internet!
Additional Exercises
Now let’s put this into practice with some additional exercises where you can do to begin building your skills.
Exercise 1
Modify the cloud function to take a new LED value; wait 1 second and then fade down to zero/off.
Exercise 2
Go back to the original program. Now add a second LED to the circuit.
Set the second LED to work as the opposite amount of brightness to the first. For example if the first is set at 55, the second should be set at 200.
Hint: led2Brightness = (255 - led1Brightness)