Tips and Tricks for Events + Data
Table of contents
-
Remember that you can only subscribe to four events per device. But every event subscriber works as a partial match so
Particle.subscribe("event-name")will also catch events likeevent-name/from/device1andevent-name/from/device2 -
BE SPECIFIC AND DETAILS: When naming events (especially for public events), keep in mind that the same event names may be used by other devices (e.g.
temperatureis pretty common). Be as specific as you can to avoid accidental triggers by events you aren’t interested in. For example:
   Particle.publish( "motion-detected" ); // trouble ahead
   Particle.publish( “appname/motion-detected” ); // better
   Particle.publish( “daraghbyrne/appname/motion-detected” ); //best
-
AVOID NETWORK FIRST: It might seem counter intuitive, but prototype everything but live networked interactions in your IoT device first. Debugging networked interactions can be tricky and time consuming. If you start with your networked interactions and built your code up from there it can be even more complex to test how your system behaves and responds. It slows down the prototyping process. Decouple how your device behaves from the networked components (webhooks and events) and you’ll move a lot further faster.
-
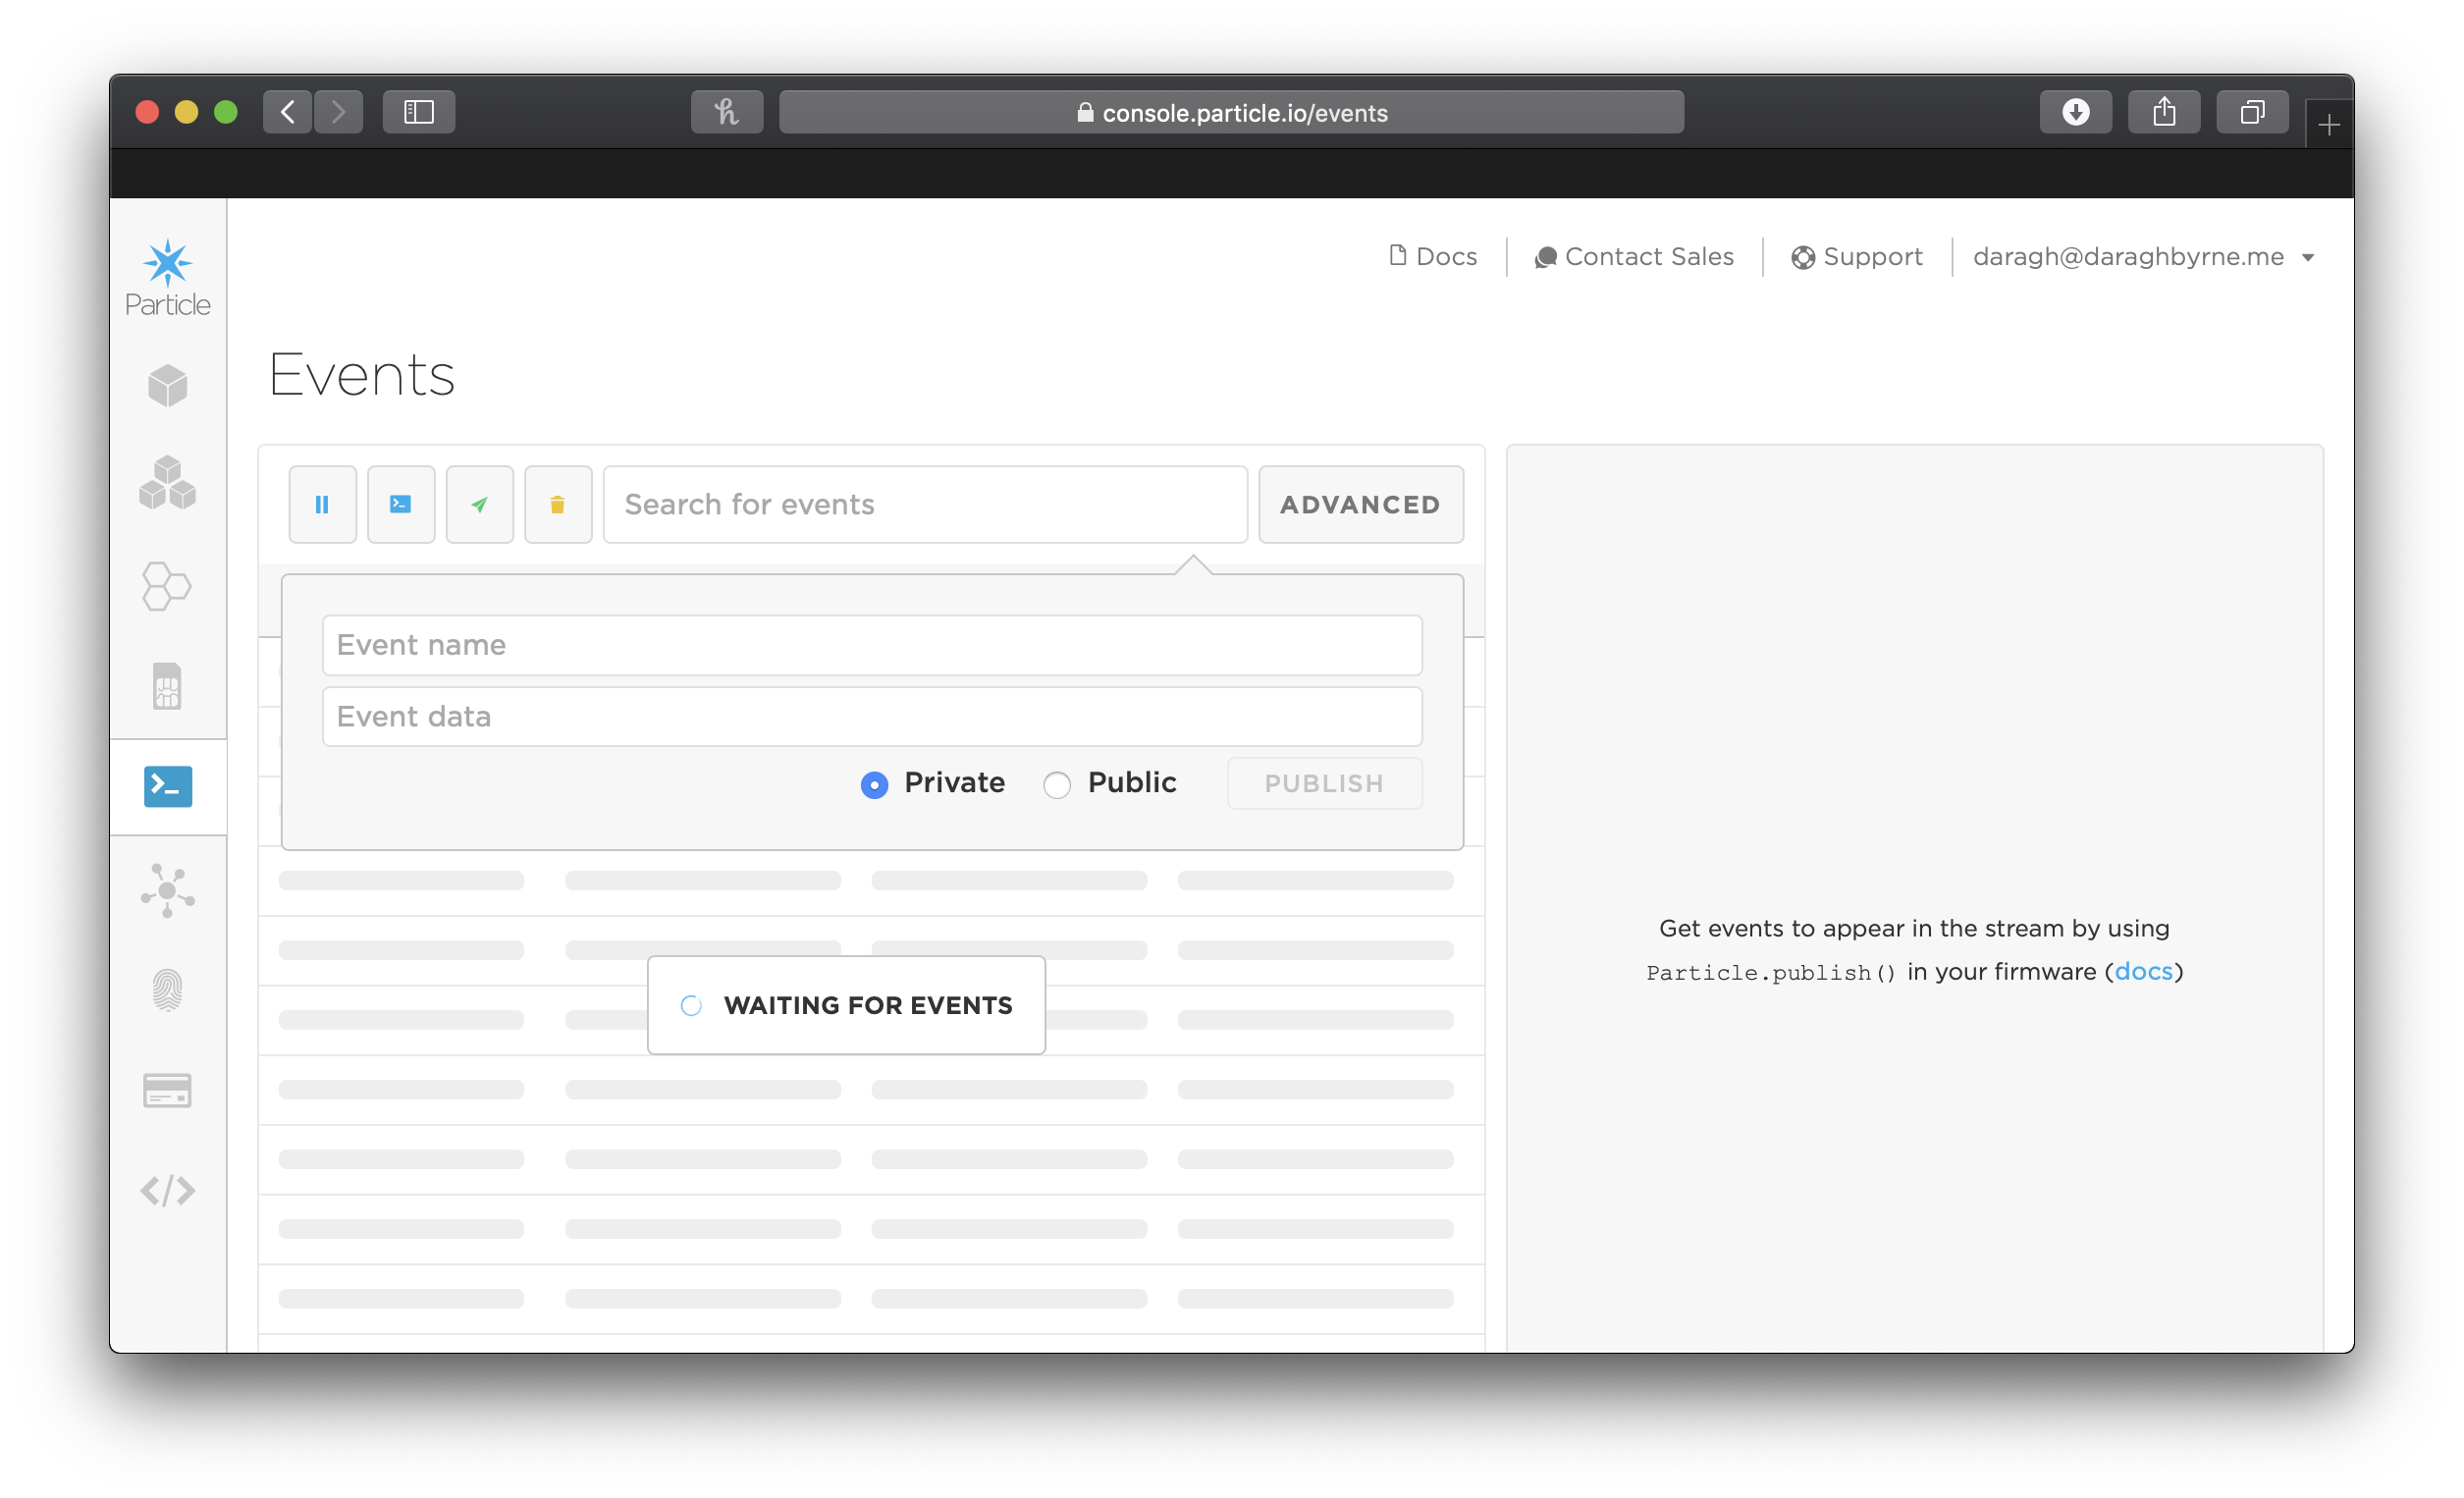
SIMULATE EVENTS: When you do add networking you can use the console to prototype networked interactions. From the console, visit the events panel (https://console.particle.io/events) you are given an option to publish events. That let’s you quickly simulate networked interactions without needing to trigger a publish directly from your device or code. When working with webhooks, this is also really useful. You can have your device trigger one webhook, inspect the data on the console, and the mock up data from the webhook by editing the response. Instead of waiting for live data to change, this makes it much quicker and easier to test your devices responses. You can simulate cases in a matter of seconds.