Reading from a Google Spreadsheet
Table of contents
- Step 1: Set up your Google Sheets document
- Step 2: Publish your Google Spreadsheet
- Step 3: Convert your spreadsheet to JSON with GSX2JSON
- Step 4: Set up your webhook in Particle.
- Step 5: Connect it to Code
Google Sheets is a pretty useful way to dummy-up data to drive your IoT Application fast. But Google Sheet’s doesn’t easily allow you to access that data. The API takes a lot of work to navigate and doesn’t make it easy to get at your data. Thankfully there’s some services that make this process a whole lot easier.
Note: There are some ways to do this with Sheets directly but it takes a lot more work
Step 1: Set up your Google Sheets document
Make sure you have all the columns and rows you think you’ll need and add some initial data to test with
IMPORTANT: Make sure to add a header row that includes the names you want your columns and data labeled with!!!

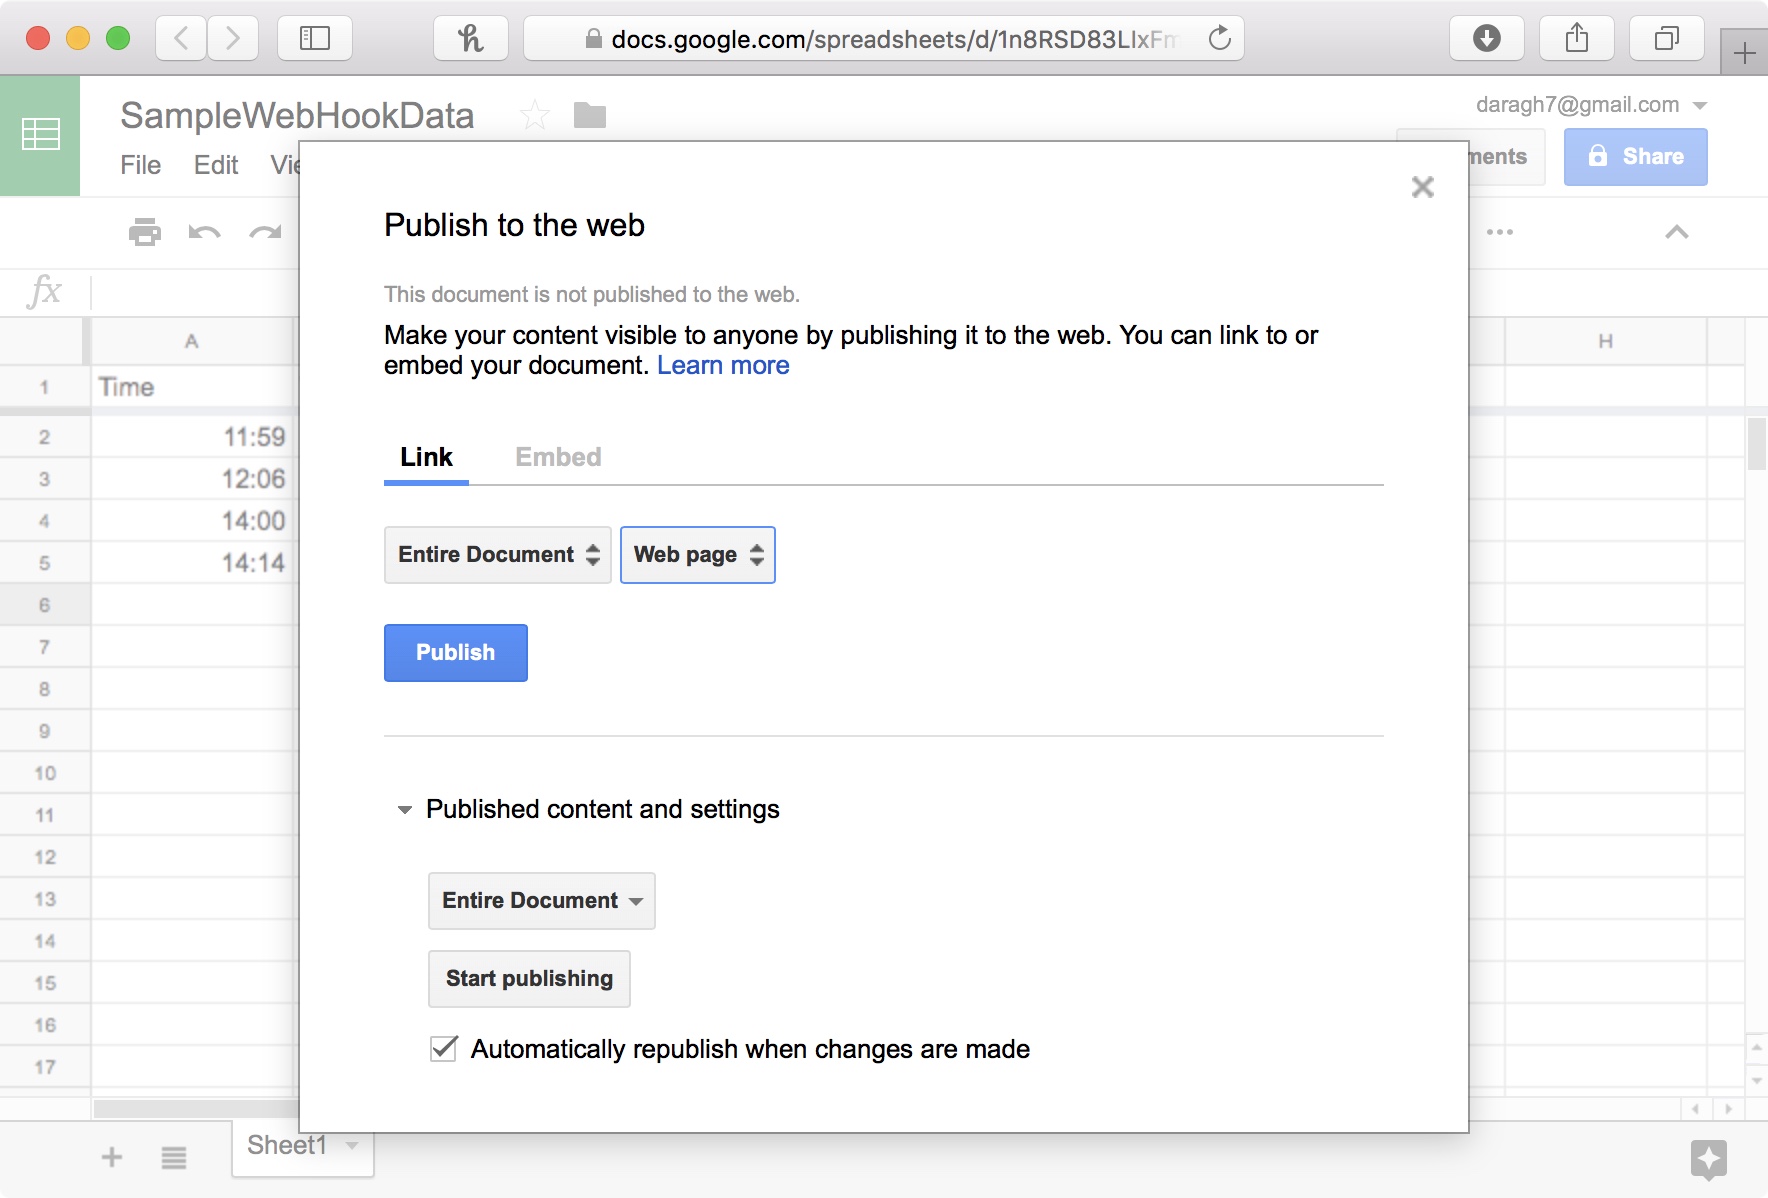
Step 2: Publish your Google Spreadsheet
Select using File -> Advanced -> Publish To Web in your Google Spreadsheet.
Make sure that the option to Automatically republish when changes are made is checked.
Click the publish button to continue.
Step 3: Convert your spreadsheet to JSON with GSX2JSON
We’ll use a service called GSX2JSON to convert our spreadsheet to usable JSON. Particle webhooks work based with JSON data - or JavaScript Object Notation is a syntax for storing and exchanging data.
We need some information about our spreadsheet in order to work with the GSX2JSON service.
-
SPREADSHEET ID The ID of your document. This is the big long alpha-numeric code in the middle of your document URL. For example if your URL is:
https://docs.google.com/spreadsheets/d/2389129371298379128/edit#gid=0Then the spreadsheet ID is2389129371298379128 -
SHEET NUMBER. By default this will be 1 (for the first tab). Your first sheet is 1, your second sheet is 2, etc. If no sheet is entered then 1 is the default If you’re using another sheet, just count in on the tabs.
-
QUERY: Anything that you want to filter by. This will search the contents of the cells and only return information matching a specific term or value.
Once you have this information you can construct a URL to use with GSX2JSON http://gsx2json.com/api?id=SPREADSHEET_ID&sheet=SHEET_NUMBER&q=QUERY
Replace the information as needed and you should end up with something like: http://gsx2json.com/api?id=1n8RSD83LIxFmcUOHdchH0CXGX4C1NkbFe0mTzm2uBAo&sheet=1&q=UNOCCUPIED
Copy and paste it into your browser’s URL bar and check that you get a result. You should see something like this:
{"columns":{"message":["UNOCCUPIED","UNOCCUPIED"]},"rows":[{"time":"14:00","value":43,"message":"UNOCCUPIED"},{"time":"14:14","value":10,"message":"UNOCCUPIED"}]}
Step 4: Set up your webhook in Particle.
Using the URL you’ve just created, set up a webhook in Particle.
Visit
Choose Webhook
Add the following:
Event Name: googlesheet [or customize as needed] URL: THE URL YOU JUST CREATED Request Type: GET Request Format: Query Parameters Device: Any
Create the webhook, and in a new tab open the events monitor: https://console.particle.io/events
Switch back to the webhook description and click the ‘TEST’ button.
You should hopefully see something like this appear in the event console window:
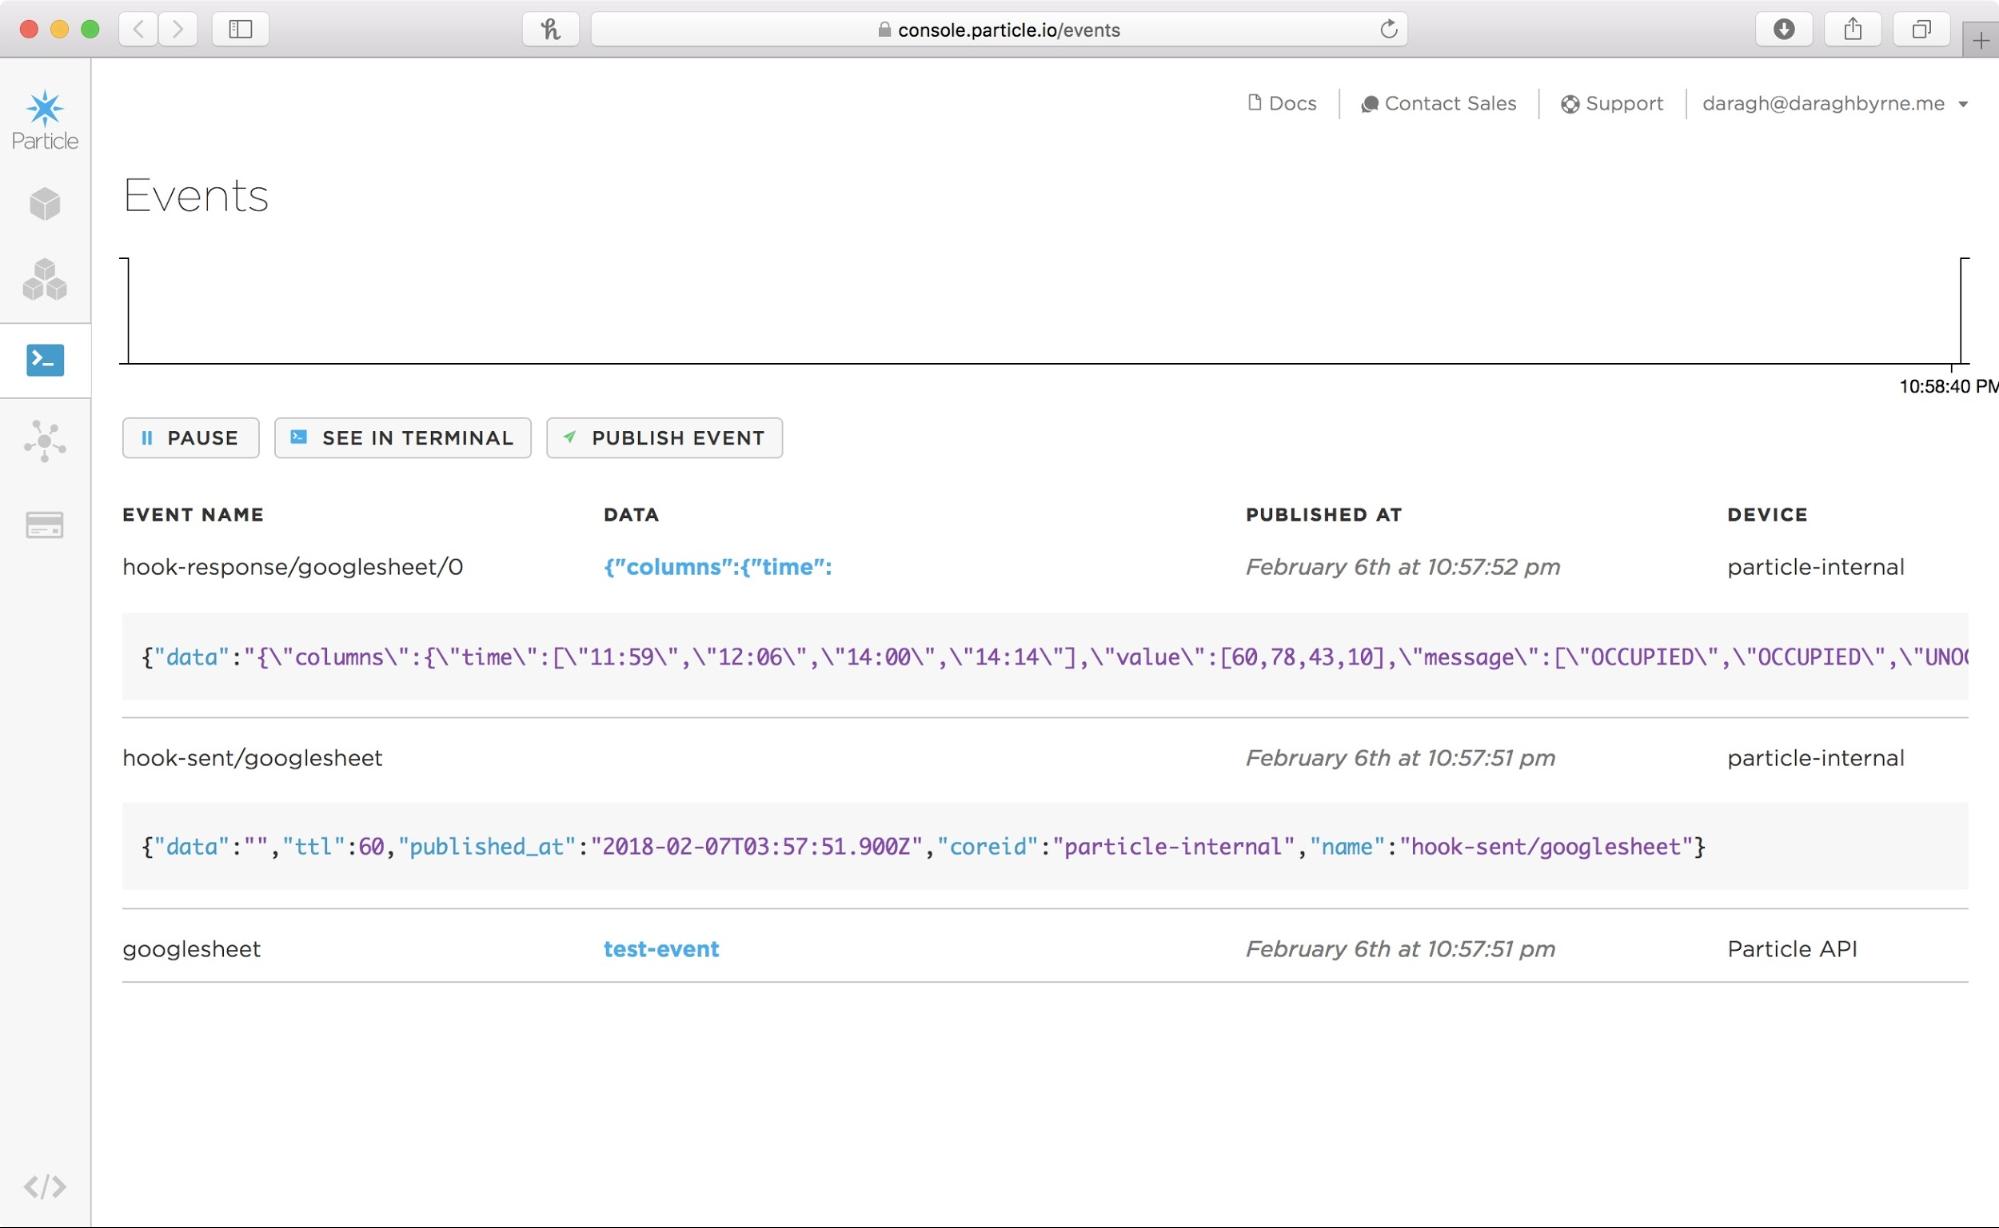
All looks good so far.
What you’ll see is that the data column has a HUGE string of information returned in JSON format. As your spreadsheet grows and you add more data, the size of the data returned to the Particle Photon will also increase. At some point, your sheet will return more information than the Particle cloud can comfortable send to your Photon. At this point you’ll see multiple events returning pieces of the information.
In order to avoid this we can write templates for our webhook response. These templates pre-filter the data from our web-service or API before it’s sent to the Photon. It essentially shrinks down the information to a tiny packet that the Photon can handle.
When developing a webhook response template, the best thing to do is focus on the essentially - what does your photon need to know in order to act on the information. More often than not, this is just the last row of information!
Return to your Webhook, click ‘EDIT’ and choose the ‘Advanced Options’
Add the following template to reveal the first rows data:
EXAMPLE 1: TO SHRINK ALL ROWS AND RETURN JUST THE VALUE COLUMN
{{#rows}}{{value}},{{/rows}}
EXAMPLE 2: TO RETURN THE FIRST ROW’S VALUE
{{ rows.0.value }}
EXAMPLE 3: TO RETURN THE FIRST ROW’S DETAILS
{{ rows.0.value }},{{ rows.0.timestamp }},{{ rows.0.message }}
Step 5: Connect it to Code
Keep in mind that your Photon will need to poll for updates every couple of minutes…
void setup() {
  Serial.begin(9600);
  // Subscribe to the integration response event
  Particle.subscribe("hook-response/googlesheet", myGoogleSheetsHandler, MY_DEVICES);
}

void myGoogleSheetsHandler(const char *event, const char *data) {
  // Handle the integration response
  Serial.println( String(data) );
}

void loop() {
   shouldRefreshSheetData();
  delay(1000);
}

// store the time when we last published
long lastSheetHookPublish = 0;
// decide how long it should be
// between publish instances
int refreshSheetAfter = 1000;
void shouldRefreshSheetData(){
  // has it been 10 minutes since we last updated
  if( lastSheetHookPublish == 0 or lastSheetHookPublish + refreshSheetAfter < millis() )
  {
        // share the event
    Particle.publish("googlesheet","", PRIVATE);
 // if we're refreshing, set the time we last called the webhook to now
    lastSheetHookPublish = millis();
  }
}