Particle Cloud and Variables
Table of contents
Earlier we looked at what the Particle cloud is and what it does. We’ve also put it to use to with our LED examples where you made functions of your Microcontroller sketch available through the cloud to be controlled by any internet enabled device through the API.
That gave you ways to control your Particle device through the internet. Now we’re going to look at how we can make data from your Particle board available on the Cloud for other devices to read and discover.
Why you ask? Well, once data is available you open up all sorts of possibilities. You can make sensor readings or application status accessible to anyone or any application on the web. You can store them. You can graph them. You can make cool visualizations of them. You can connect them to other internet appliances or online services. The possibilities once you make the data available are pretty exciting!
Exposing Variables
That begs the question, how do we make our variables available?
Much like connecting functions to the cloud, connecting variables only takes a line of code. Once this is done, you can call your function remotely from a webpage, via an API call or from another device.
Imagine we have made an Air Quality Monitor, we would want to be able to see that data in detail. A small microcontroller app isn’t often the best way to do it, so making it available online makes the data portable. Portability means it can be used in a lot of different ways by a lot of different things. For example, once its on the cloud we could create a mobile application or webpage to graph the data and give us a real time and historical view of the information.
Worked Example
First we need to create a variable connected to a sensor. Imagine your sketch is set up like this:
int lightSensorPin = A0; // connected to analog pin 0
int lightReading; // define a variable to store our sensor reading

void setup()
{
    // We don’t need to do anything here... yet
}

void loop()
{
  // read from the sensor to the variable
  lightReading = analogRead(lightSensorPin);
}
Connecting it to the Cloud
Now it takes us one line of code to make this available online
int lightSensorPin = A0; // connected to analog pin 0
int lightReading; // define a variable to store our sensor reading

void setup()
{
  Particle.variable("light", lightReading);
}

void loop()
{
  // read from the sensor to the variable
  lightReading = analogRead(lightSensorPin);
}
With one line of code we have created an online API for our function which can be called from any internet connected device or application.
Particle.variable takes three parameters. The first is what the variable is named online. The second is which variable it maps to in the Sketch code. Finally, we tell it what type of variable it is.
Particle.variable
There are three data types that you can make available as a Particle Cloud Variable
-
INT
-
DOUBLE
-
STRING (maximum string size is 622 bytes)
They can be set up like this:
int analogvalue = 0;
double tempC = 0;
char *message = "my name is particle";

void setup()
{
  // variable name max length is 12 characters long
  Particle.variable("analogvalue", analogvalue);
  Particle.variable("temp", tempC);
  Particle.variable("mess", message);
  pinMode(A0, INPUT);
}
Naming your Cloud Variables
If you have used a Cloud variable name (the first parameter passed to Particle.variable) longer than 12 characters it will be truncated to 12 characters. For example: someIncrediblyLongVariable becomes someIncredib
Accessing Cloud Variables
First deploy your Sketch to the microcontroller. Then you can access it in a lot of different ways.
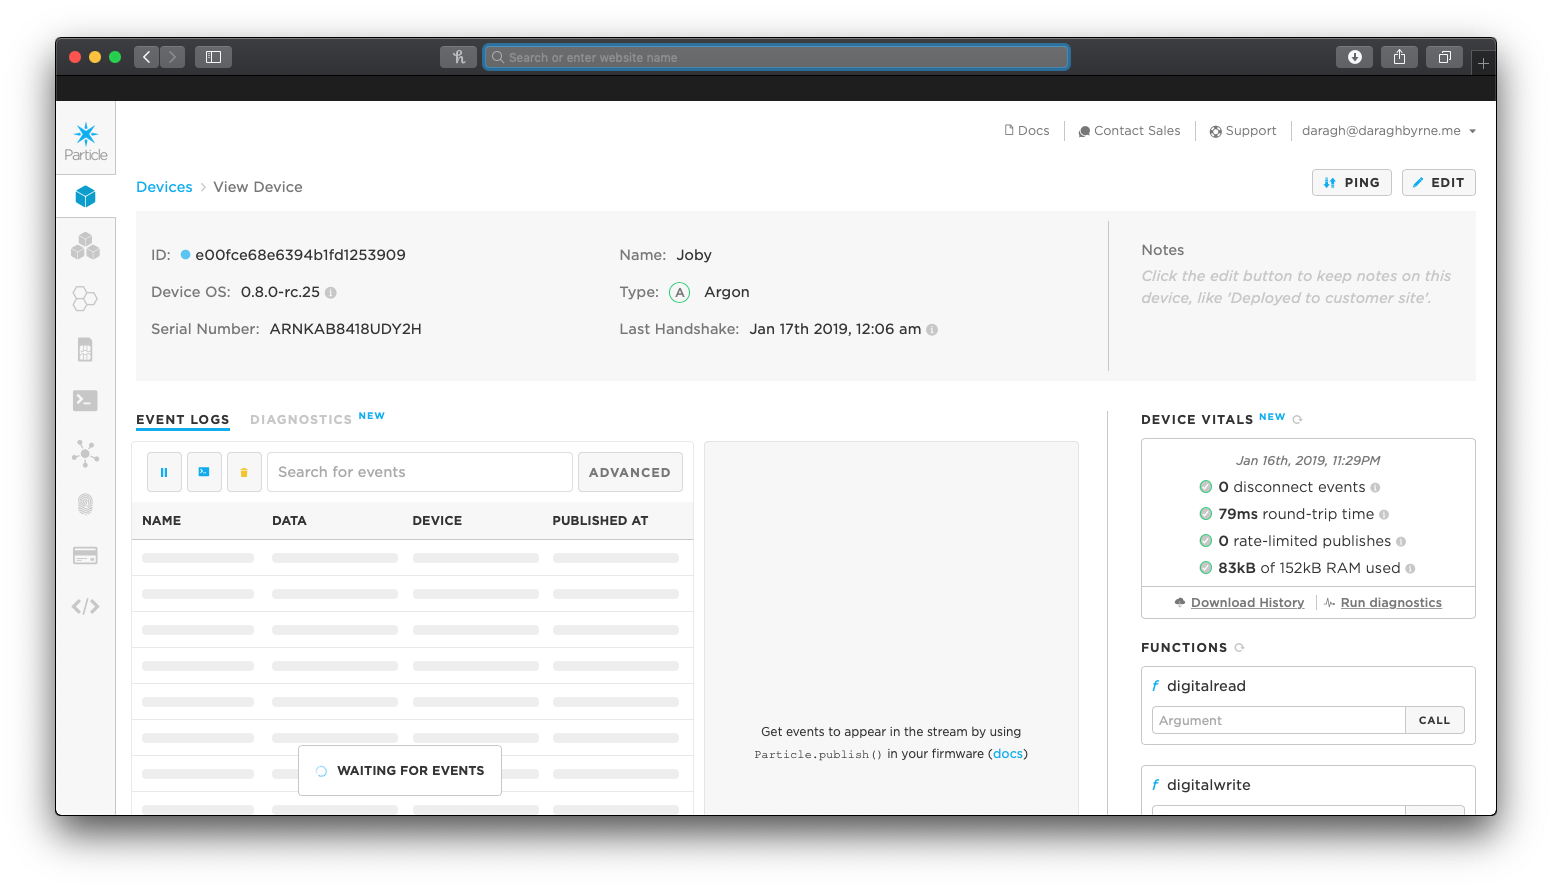
a) Using Particle Console
Navigate to the Particle console online at http://console.particle.io, choose your device and you’ll see a list of it’s variables on the right hand side
b) Using The CLI
If you have the command line interface installed on your desktop you can access Particle variables as follows
Call:
    particle variable list - Show variables provided by your device(s)
    particle variable get - Retrieve a value from your device
    particle variable monitor - Connect and display messages from a device
For example, to get a variable:
particle variable get [device_id] [variable_name]
e.g.
particle variable get 360031000447343232363230 mess
would return
"my name is particle"
c) Using REST
The Particle framework automatically creates a REST based API for us - or a structured way to call it via the internet. To access the function, we make a HTTP POST request as follows
POST http://api.particle.io/v1/devices/{DEVICE_ID}/{VARIABLE_NAME}</td>
Where {DEVICE_ID} is replaced with the Device ID number and {VARIABLE} is replaced with the variable name you gave it (the bit in quotes). If you don’t know your Device ID, you can find it at http://build.particle.io/
This is how mobile devices or other internet applications would connect to it.
It takes two parameters:
-
access_token : Generate one from particle.io/build
-
args: Pass in variables as a comma separated string for your function
d) Using Terminal + cURL (OSX only)
Open up the Terminal Utility by visiting your Applications folders. You’ll find it in the Utilities sub-folder.
From the command line use the in-built cURL library to make a call to the REST API.
# EXAMPLE REQUEST
curl https://api.particle.io/v1/devices/[device_id]/[variable_name]?access_token=[access_token]
Learn More:
Read up on the Particle Cloud API at http://docs.particle.io/api/